关于Thrift和OpenSSL的安全通信,上篇我们描述了zlib的编译方法,本文编译libevent库。
- 01#编译OpenSSL库;
- 02#编译Boost库;
- 03#编译zlib库;
- 04#编译libevent库;
- 05#编译Thrift库;
- 06#生成客户端和服务端通信所用的数字证书;
- 07#编写基于Linux系统的测试代码(单向验证:客户端验证服务端);
- 08#编写基于Windows系统的测试代码(单向验证:客户端验证服务端);
- 09#编写基于Linux系统的测试代码(双向验证:客户端验证服务端+服务端验证客户端);
- 10#编写基于Windows系统的测试代码(双向验证:客户端验证服务端+服务端验证客户端);
- 11#自定义数字证书的验证策略;
我们知道x509数字证书有V1和V3版本,对于我们来说采用V1版本即可,考虑到证书生成的便捷性,推荐使用如下的第二种方法生成我们需要的证书。
证书生成方法1:交互模式生成证书-V1版本
第一步,将下述内容保存为文件,名称可以为openssl.cnf,后续在使用openssl命令时将使用到。
 1
 2
 3
 4
 5
 6
 7
 8
 9
10
11
12
13
14
15
16
17
18
19
20
21
22
23
24
| [req]
distinguished_name = req_distinguished_name
[req_distinguished_name]
countryName = Country Name (2 letter code)
countryName_default = AU
countryName_min = 2
countryName_max = 2
stateOrProvinceName = State or Province Name (full name)
stateOrProvinceName_default = Some-State
localityName = Locality Name (eg, city)
0.organizationName = Organization Name (eg, company)
0.organizationName_default = Internet Widgits Pty Ltd
organizationalUnitName = Organizational Unit Name (eg, section)
commonName = Common Name (e.g. server FQDN or YOUR name)
commonName_max = 64
emailAddress = Email Address
emailAddress_max = 64
|
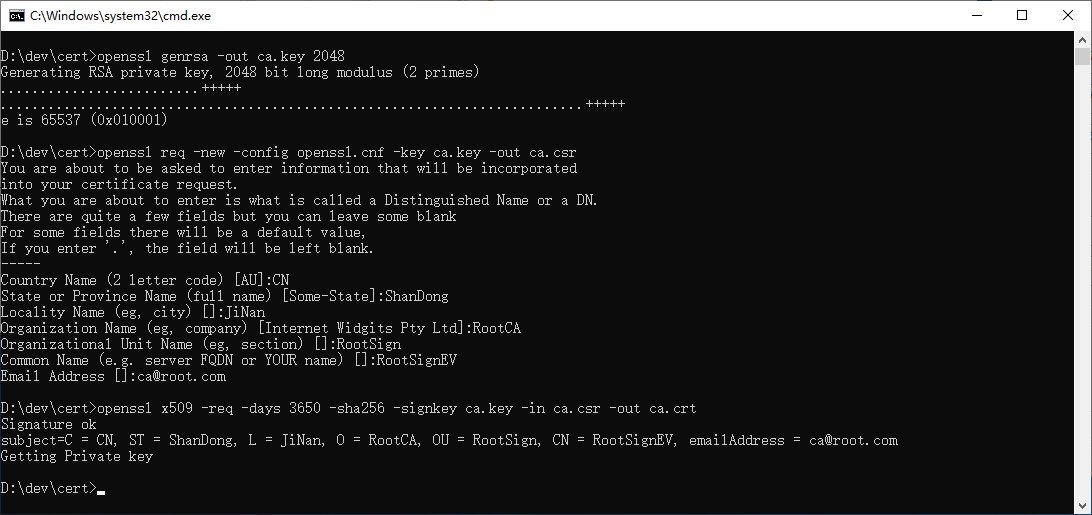
第二步,使用如下命令创建根证书的私钥和公钥证书文件:
1
2
3
4
5
| openssl genrsa -out ca.key 2048
openssl req -new -config openssl.cnf -key ca.key -out ca.csr
openssl x509 -req -days 3650 -sha256 -signkey ca.key -in ca.csr -out ca.crt
|
上述命令执行过程如下图所示:
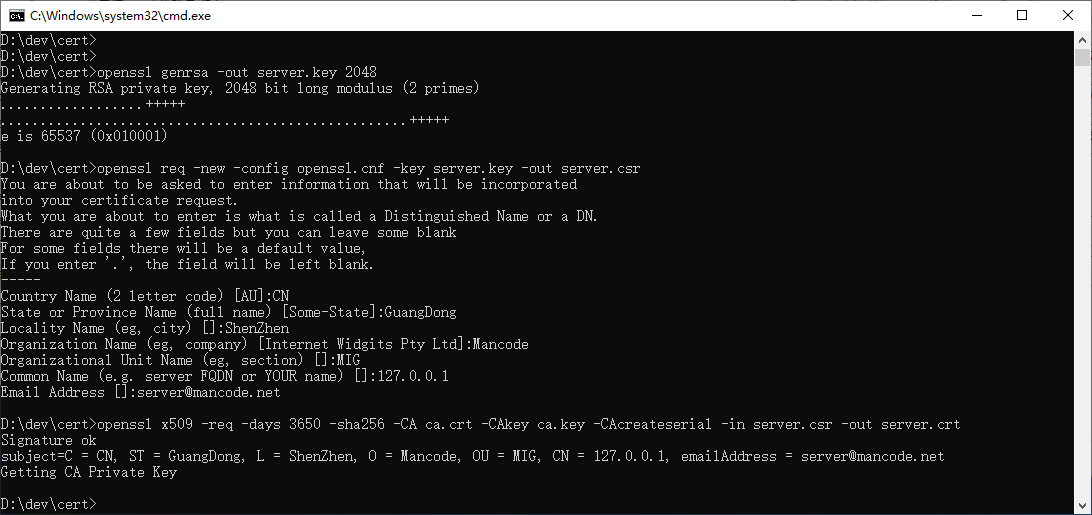
第三步,使用如下命令创建服务端证书的私钥和公钥证书文件:
1
2
3
4
5
| openssl genrsa -out server.key 2048
openssl req -new -config openssl.cnf -key server.key -out server.csr
openssl x509 -req -days 3650 -sha256 -CA ca.crt -CAkey ca.key -CAcreateserial -in server.csr -out server.crt
|
上述命令执行过程如下图所示:
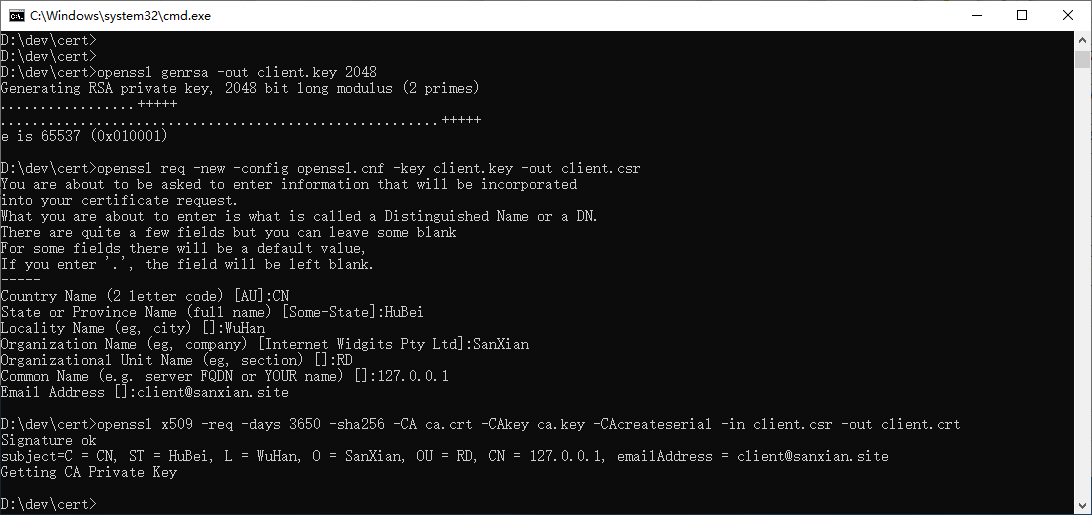
第四步,使用如下命令创建客户端证书的私钥和公钥证书文件:
1
2
3
4
5
| openssl genrsa -out client.key 2048
openssl req -new -config openssl.cnf -key client.key -out client.csr
openssl x509 -req -days 3650 -sha256 -CA ca.crt -CAkey ca.key -CAcreateserial -in client.csr -out client.crt
|
上述命令执行过程如下图所示:
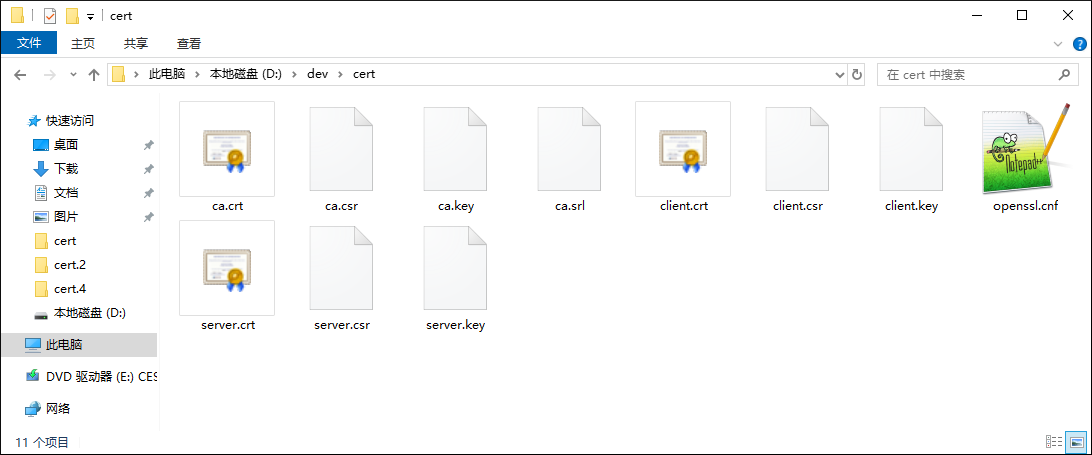
上述命令执行完毕,我们可以在当前目录看到如下文件:
证书生成方法2:非交互模式生成证书-V1版本(该方法是本系列推荐的方法,比较简单实用)
第一步,将下述内容保存为文件,名称可以为min.cnf,后续在使用openssl命令时将使用到。
1
2
3
4
| [req]
distinguished_name = req_distinguished_name
[req_distinguished_name]
|
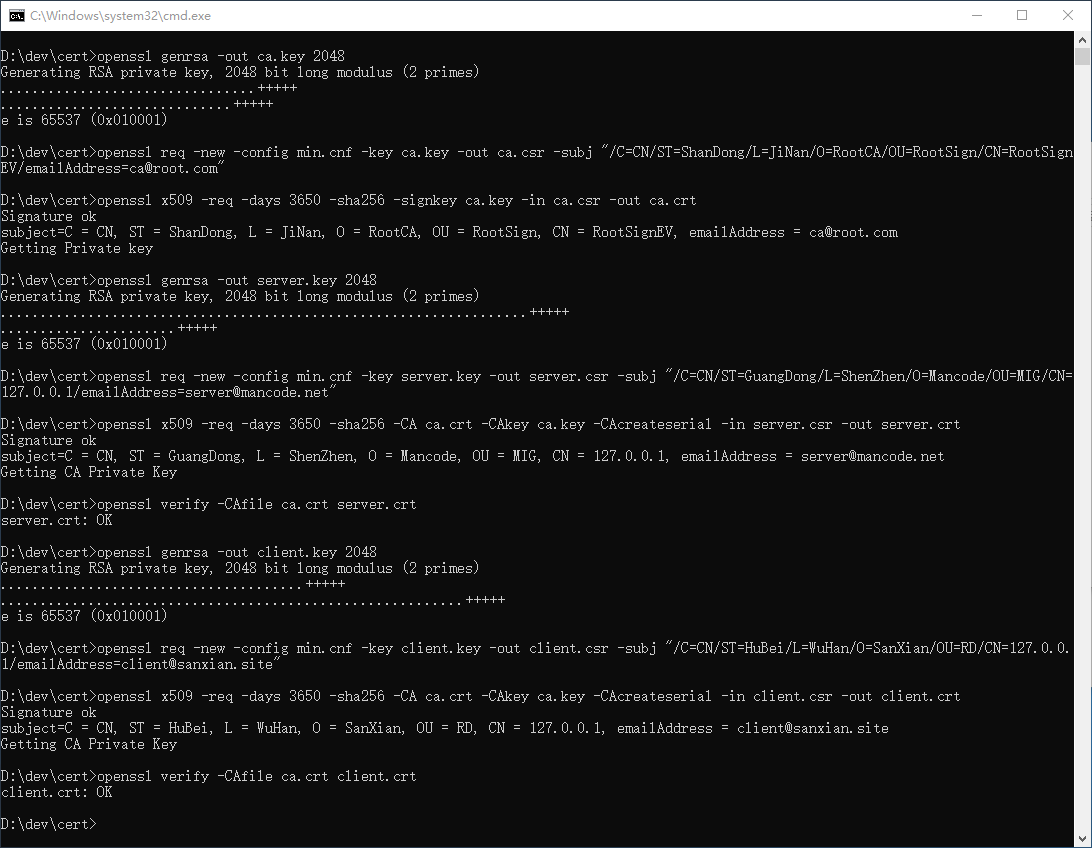
第二步,使用如下命令创建根证书的私钥和公钥证书文件:
1
2
3
4
5
6
| ##R1) 根证书的生成命令
openssl genrsa -out ca.key 2048
openssl req -new -config min.cnf -key ca.key -out ca.csr -subj "/C=CN/ST=ShanDong/L=JiNan/O=RootCA/OU=RootSign/CN=RootSignEV/emailAddress=ca@root.com"
openssl x509 -req -days 3650 -sha256 -signkey ca.key -in ca.csr -out ca.crt
|
第三步,使用如下命令创建服务端证书的私钥和公钥证书文件:
 1
 2
 3
 4
 5
 6
 7
 8
 9
10
| ##S1) 服务端证书生成命令:
openssl genrsa -out server.key 2048
openssl req -new -config min.cnf -key server.key -out server.csr -subj "/C=CN/ST=GuangDong/L=ShenZhen/O=Mancode/OU=MIG/CN=127.0.0.1/emailAddress=server@mancode.net"
##S2) 根证书对服务端证书进行签名,命令:
openssl x509 -req -days 3650 -sha256 -CA ca.crt -CAkey ca.key -CAcreateserial -in server.csr -out server.crt
##S3) 服务端证书的验证,命令:
openssl verify -CAfile ca.crt server.crt
|
第四步,使用如下命令创建客户端证书的私钥和公钥证书文件:
 1
 2
 3
 4
 5
 6
 7
 8
 9
10
| ##C1) 客户端证书生成命令:
openssl genrsa -out client.key 2048
openssl req -new -config min.cnf -key client.key -out client.csr -subj "/C=CN/ST=HuBei/L=WuHan/O=SanXian/OU=RD/CN=127.0.0.1/emailAddress=client@sanxian.site"
##C2) 根证书对客户端证书进行签名,命令:
openssl x509 -req -days 3650 -sha256 -CA ca.crt -CAkey ca.key -CAcreateserial -in client.csr -out client.crt
##C3) 客户端证书的验证,命令:
openssl verify -CAfile ca.crt client.crt
|
依次使用上述命令,执行过程如下图所示:
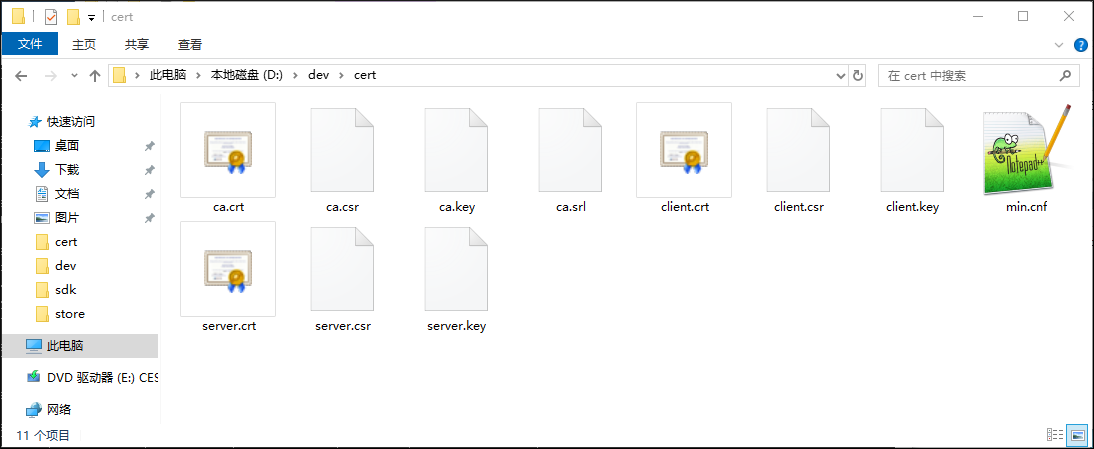
上述命令执行完毕,我们可以在当前目录看到如下文件:
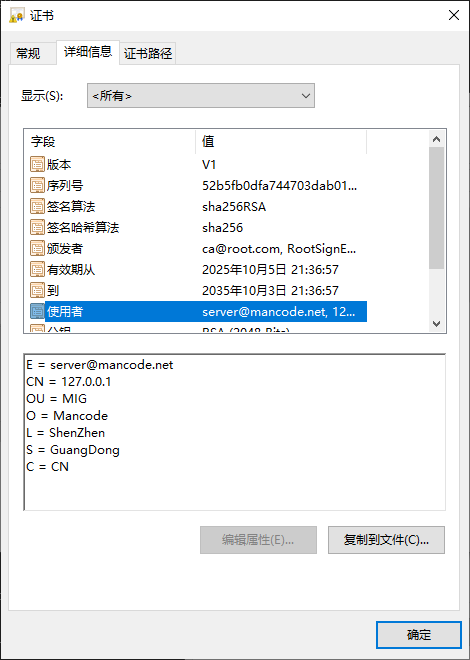
双击各数字证书文件,我们查看下证书的使用者信息:
这里简单介绍一下,使用者信息中的各种简写参数的含义:
| 证书中的参数简写 | openssl命令参数 | 含义 | 备注 |
| C | C | Country Name (2 letter code) | 国家代码(2位) |
| S | ST | State or Province Name (full name) | 省份/州 |
| L | L | Locality Name (eg, city) | 城市名称 |
| O | O | Organization Name (eg, company) | 公司/组织名称 |
| OU | OU | Organizational Unit Name (eg, section) | 部门名称 |
| CN | CN | Common Name (e.g. server FQDN or YOUR name) | 通用名称,通常是域名/个人姓名/IP地址 |
| E | emailAddress | Email Address | 邮箱地址 |
至此,使用当前方法已生成了客户端和服务端通信用的数字证书,各证书的具体的使用方法,我们将在后文介绍。
证书生成方法3:非交互模式生成证书-V3版本
第一步,将下述内容保存为文件,名称可以为openssl.cnf,后续在使用openssl命令时将使用到。
 1
 2
 3
 4
 5
 6
 7
 8
 9
10
11
12
13
14
15
16
17
18
19
20
21
22
23
24
25
26
27
| [req]
prompt = no
default_bits = 2048
distinguished_name = req_distinguished_name
x509_extensions = v3_ca
req_extensions = v3_req
[v3_req]
basicConstraints = CA:FALSE
keyUsage = nonRepudiation, digitalSignature, keyEncipherment
subjectAltName = @alternate_names
[alternate_names]
IP.1=127.0.0.1
IP.2=::1
IP.3=::ffff:127.0.0.1
DNS.1=localhost
[v3_ca]
subjectKeyIdentifier = hash
authorityKeyIdentifier = keyid:always,issuer
basicConstraints = critical, CA:TRUE, pathlen:0
keyUsage = critical, cRLSign, keyCertSign, nonRepudiation, digitalSignature, keyEncipherment
extendedKeyUsage = serverAuth, clientAuth
subjectAltName = @alternate_names
[req_distinguished_name]
|
第二步,使用如下命令,依次生成根证书、服务端证书、客户端证书:
 1
 2
 3
 4
 5
 6
 7
 8
 9
10
11
12
13
14
15
16
17
18
19
20
21
22
23
24
25
26
27
28
| ##R1) 根证书的生成命令
openssl genrsa -out ca.key 2048
openssl req -new -config openssl.cnf -key ca.key -out ca.csr -subj "/C=CN/ST=ShanDong/L=JiNan/O=RootCA/OU=RootSign/CN=RootSignEV/emailAddress=ca@root.com"
openssl x509 -req -extfile openssl.cnf -days 3650 -sha256 -signkey ca.key -in ca.csr -out ca.crt -extensions v3_req -extensions v3_ca
##S1) 服务端证书生成命令:
openssl genrsa -out server.key 2048
openssl req -new -config openssl.cnf -key server.key -out server.csr -subj "/C=CN/ST=GuangDong/L=ShenZhen/O=Mancode/OU=MIG/CN=127.0.0.1/emailAddress=server@mancode.net"
##S2) 根证书对服务端证书进行签名,命令:
openssl x509 -req -extfile openssl.cnf -days 3650 -sha256 -CA ca.crt -CAkey ca.key -CAcreateserial -in server.csr -out server.crt -extensions v3_req -extensions v3_ca
##S3) 服务端证书的验证,命令:
openssl verify -CAfile ca.crt server.crt
##C1) 客户端证书生成命令:
openssl genrsa -out client.key 2048
openssl req -new -config openssl.cnf -key client.key -out client.csr -subj "/C=CN/ST=HuBei/L=WuHan/O=SanXian/OU=RD/CN=127.0.0.1/emailAddress=client@sanxian.site"
##C2) 根证书对客户端证书进行签名,命令:
openssl x509 -req -extfile openssl.cnf -days 3650 -sha256 -CA ca.crt -CAkey ca.key -CAcreateserial -in client.csr -out client.crt -extensions v3_req -extensions v3_ca
##C3) 客户端证书的验证,命令:
openssl verify -CAfile ca.crt client.crt
|
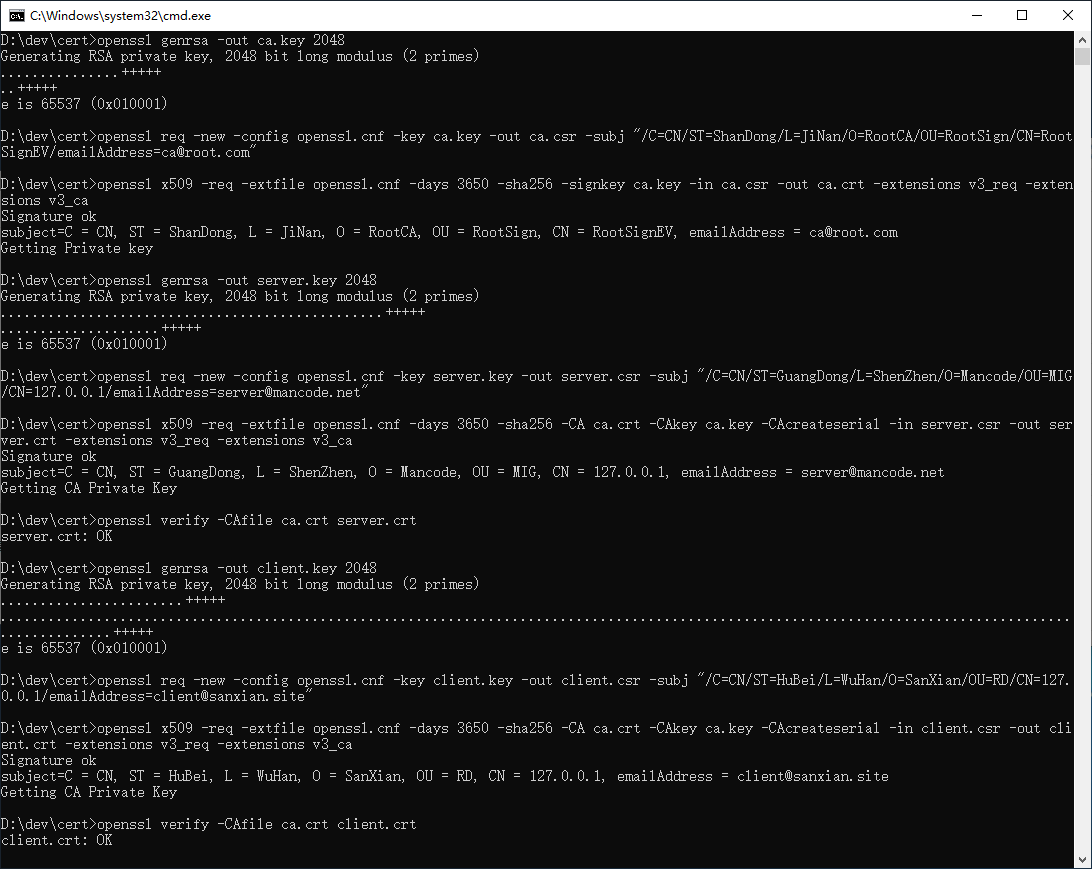
依次使用上述命令,执行过程如下图所示:
上述命令执行完毕,我们可以在当前目录看到如下文件:

证书生成方法4:非交互模式生成证书-基于配置文件-V3版本
第一步,将下述内容保存为:rootca.cnf
 1
 2
 3
 4
 5
 6
 7
 8
 9
10
11
12
13
14
15
16
17
18
19
20
21
22
23
24
25
26
27
28
29
30
31
32
33
34
| [req]
prompt = no
default_bits = 2048
distinguished_name = req_distinguished_name
x509_extensions = v3_ca
req_extensions = v3_req
[v3_req]
basicConstraints = CA:FALSE
keyUsage = nonRepudiation, digitalSignature, keyEncipherment
subjectAltName = @alternate_names
[alternate_names]
IP.1=127.0.0.1
IP.2=::1
IP.3=::ffff:127.0.0.1
DNS.1=localhost
[v3_ca]
subjectKeyIdentifier = hash
authorityKeyIdentifier = keyid:always,issuer
basicConstraints = critical, CA:TRUE, pathlen:0
keyUsage = critical, cRLSign, keyCertSign, nonRepudiation, digitalSignature, keyEncipherment
extendedKeyUsage = serverAuth, clientAuth
subjectAltName = @alternate_names
[req_distinguished_name]
C = CN
ST = ShanDong
L = JiNing
O = RootCA
OU = RootSign
CN = RootSignEV
emailAddress = ca@rootca.com
|
第二步,将下述内容保存为:server.cnf
 1
 2
 3
 4
 5
 6
 7
 8
 9
10
11
12
13
14
15
16
17
18
19
20
21
22
23
24
25
26
27
28
29
30
31
32
33
34
| [req]
prompt = no
default_bits = 2048
distinguished_name = req_distinguished_name
x509_extensions = v3_ca
req_extensions = v3_req
[v3_req]
basicConstraints = CA:FALSE
keyUsage = nonRepudiation, digitalSignature, keyEncipherment
subjectAltName = @alternate_names
[alternate_names]
IP.1=127.0.0.1
IP.2=::1
IP.3=::ffff:127.0.0.1
DNS.1=localhost
[v3_ca]
subjectKeyIdentifier = hash
authorityKeyIdentifier = keyid:always,issuer
basicConstraints = critical, CA:TRUE, pathlen:0
keyUsage = critical, cRLSign, keyCertSign, nonRepudiation, digitalSignature, keyEncipherment
extendedKeyUsage = serverAuth, clientAuth
subjectAltName = @alternate_names
[req_distinguished_name]
C = CN
ST = GuangDong
L = ShenZhen
O = Mancode
OU = MIG
CN = 127.0.0.1
emailAddress = server@mancode.net
|
第三步,将下述内容保存为:client.cnf
 1
 2
 3
 4
 5
 6
 7
 8
 9
10
11
12
13
14
15
16
17
18
19
20
21
22
23
24
25
26
27
28
29
30
31
32
33
34
| [req]
prompt = no
default_bits = 2048
distinguished_name = req_distinguished_name
x509_extensions = v3_ca
req_extensions = v3_req
[v3_req]
basicConstraints = CA:FALSE
keyUsage = nonRepudiation, digitalSignature, keyEncipherment
subjectAltName = @alternate_names
[alternate_names]
IP.1=127.0.0.1
IP.2=::1
IP.3=::ffff:127.0.0.1
DNS.1=localhost
[v3_ca]
subjectKeyIdentifier = hash
authorityKeyIdentifier = keyid:always,issuer
basicConstraints = critical, CA:TRUE, pathlen:0
keyUsage = critical, cRLSign, keyCertSign, nonRepudiation, digitalSignature, keyEncipherment
extendedKeyUsage = serverAuth, clientAuth
subjectAltName = @alternate_names
[req_distinguished_name]
C = CN
ST = HuBei
L = WuHan
O = SanXian
OU = RD
CN = 127.0.0.1
emailAddress = client@sanxian.site
|
第四步,使用如下命令,依次生成根证书、服务端证书、客户端证书:
 1
 2
 3
 4
 5
 6
 7
 8
 9
10
11
12
13
14
15
16
17
18
19
20
21
22
23
24
25
26
27
28
| ##R1) 根证书的生成命令:
openssl genrsa -out ca.key 2048
openssl req -new -config rootca.cnf -key ca.key -out ca.csr
openssl x509 -req -extfile rootca.cnf -days 3650 -sha256 -signkey ca.key -in ca.csr -out ca.crt -extensions v3_req -extensions v3_ca
##S1) 服务端证书生成命令:
openssl genrsa -out server.key 2048
openssl req -new -config server.cnf -key server.key -out server.csr
##S2) 根证书对服务端证书进行签名,命令:
openssl x509 -req -extfile server.cnf -days 3650 -sha256 -CA ca.crt -CAkey ca.key -CAcreateserial -in server.csr -out server.crt -extensions v3_req -extensions v3_ca
##S3) 服务端证书的验证,命令:
openssl verify -CAfile ca.crt server.crt
##C1) 客户端证书生成命令:
openssl genrsa -out client.key 2048
openssl req -new -config client.cnf -key client.key -out client.csr
##C2) 根证书对客户端证书进行签名,命令:
openssl x509 -req -extfile client.cnf -days 3650 -sha256 -CA ca.crt -CAkey ca.key -CAcreateserial -in client.csr -out client.crt -extensions v3_req -extensions v3_ca
##C3) 客户端证书的验证,命令:
openssl verify -CAfile ca.crt client.crt
|
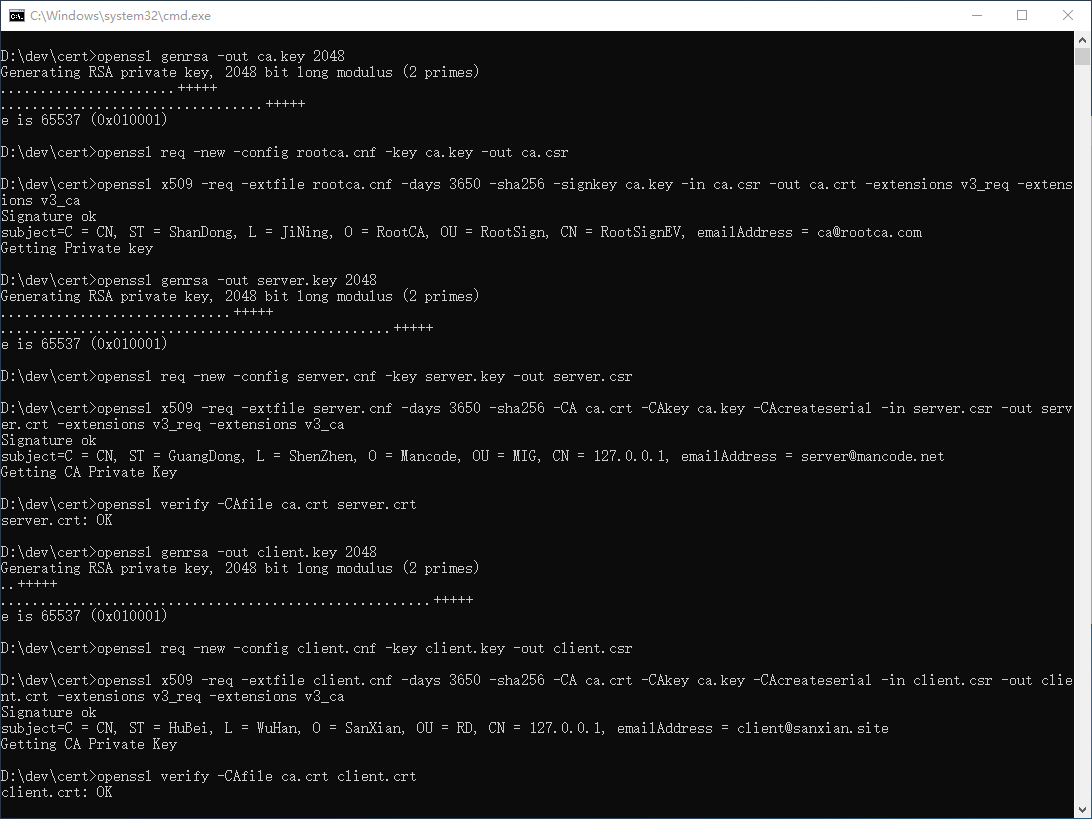
依次使用上述命令,执行过程如下图所示:
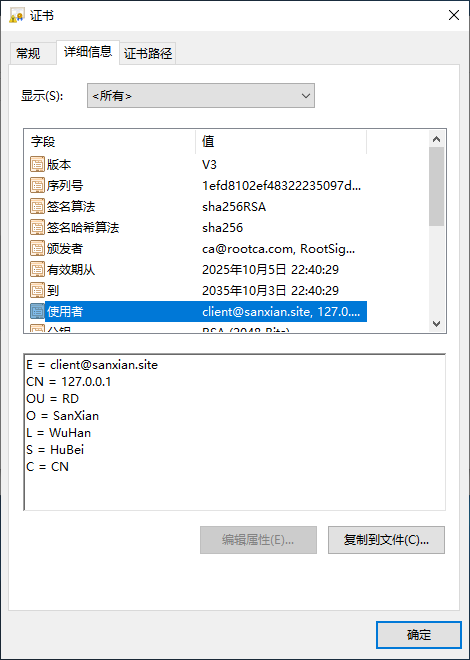
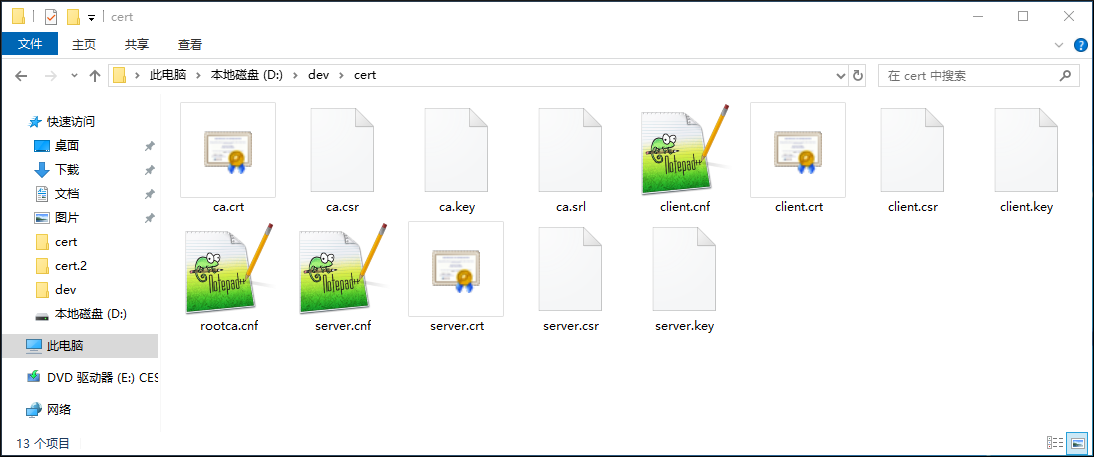
上述命令执行完毕,我们可以在当前目录看到如下文件:
双击各数字证书文件,我们查看下证书的使用者信息: